

How to Achieve Consistent Coffee Roast Levels
Table of Contents
- Why Consistency Is the Hardest Part of Roasting
- Preheating and Thermal Stability: The Foundation of Consistent Coffee Roast Levels
- How to Identify First Crack and Development Time
- Batch Size, Drum Loading, and Airflow Control
- Roasting Coffee by Sight vs Temperature
- Using Coffee Roast Profile Software for Repeatability
- How to Identify Roast Defects
- Managing Environmental Factors and Post-Roast Resting
- Conclusion
- Frequently Asked Questions
Last Updated: September 10, 2026
Why Consistency Is the Hardest Part of Roasting
Ask any roaster what separates a good batch from a great one and you'll hear the same word: repeatability. Learning how to achieve consistent coffee roast levels is the hardest skill in roasting, because every variable in the drum fights you at once. This guide breaks down the controls, checkpoints, and logging habits that turn a lucky batch into a repeatable one.
Roasting is a moving target: green coffee changes as it rests, ambient conditions shift, and your roaster's thermal behavior never resets perfectly.
Consistency is a process-control problem, not a measurement one. You don't need a lab-grade roaster, just control the handful of inputs that move the cup.
Preheating and Thermal Stability: The Foundation of Consistent Coffee Roast Levels
Thermal stability means bringing the roaster to a steady, known temperature before beans touch the drum. Skip it and your first batch will taste different from your second, every time.
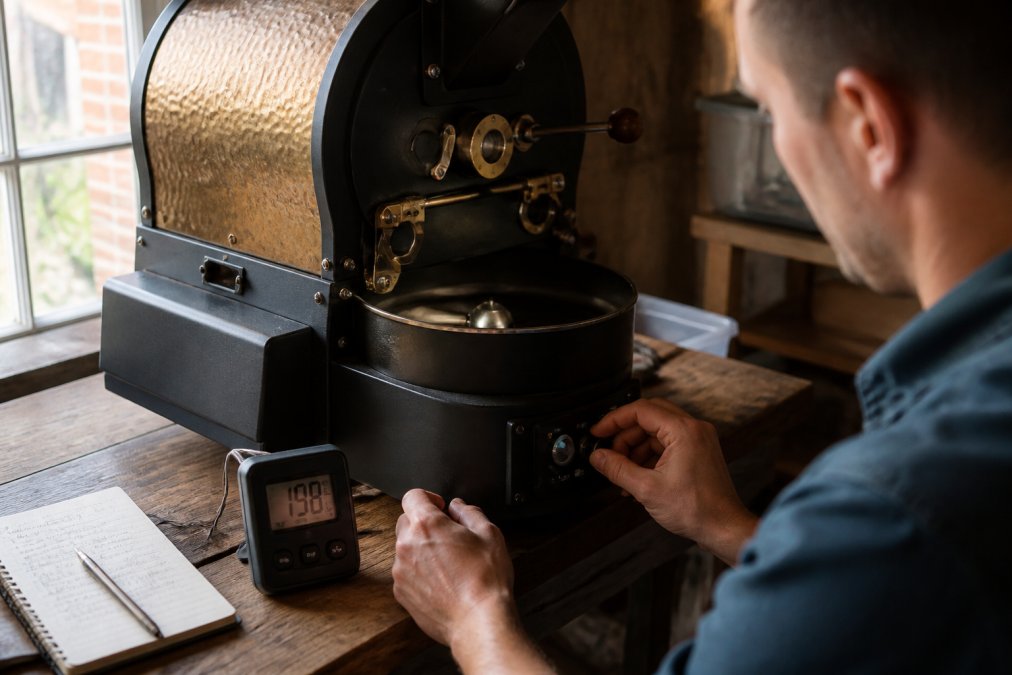
Charge Temperature and Thermal Mass
Charge temperature is the drum temperature when you drop in the beans; thermal mass is how much heat the metal holds. A heavy drum recovers faster after the charge but takes longer to preheat. Log charge temperature every batch and hold it within a narrow band, if it swings, your rate of rise swings with it.
Managing Roast Time and Rate of Rise
Rate of rise is how fast bean temperature climbs per minute. A steady, gently declining rate of rise produces even development; a spiky one produces uneven roast color and baked or scorched notes. Aim for smooth, not fast.
How to Identify First Crack and Development Time
First crack is the popping sound signaling beans have built enough internal steam pressure to fracture. It starts development time, the window between first crack and drop that decides roast level.
Listen for a rolling, popcorn-like crack rather than a single pop. Development time runs a fraction of total roast time; stretching it too far flattens acidity, while shortening it leaves grassy, underdeveloped notes.
- Light roast: drop shortly after first crack ends
- Medium roast: extend development past first crack into the gap before second crack
- Dark roast: push toward or into second crack, watching for oil on the surface
Batch Size, Drum Loading, and Airflow Control
Batch size and airflow are the two levers most home roasters ignore. Overloading crowds the beans, blocks agitation, and produces uneven roast color; underloading lets heat escape and rushes the roast.

Airflow moves heat and chaff through the drum. Too little traps smoke and mutes flavor; too much pulls heat away and stalls the rate of rise. Adjust in small steps and log every change.
Roasting Coffee by Sight vs Temperature
Roasting coffee by sight versus temperature is a genuine debate, and you need both, but you must know what each can and cannot tell you. Sight reports surface color and oil development; temperature reports the thermal curve underneath. Neither alone is a control system.
What Your Temperature Probe Is Actually Reading
Most home drum roasters ship with one probe, usually an environmental probe in the drum wall or exhaust path. It reads the air around the beans, not the beans, reacting fast and swinging hard on every burner change. A bean probe, a thermocouple or RTD inserted into the bean mass through the drum face, reads actual bean temperature and lags the environmental probe by design.
This distinction matters because the two probes tell different stories:
- Environmental probe: shows how much heat the drum is delivering right now. Useful for spotting stalls and burner problems.
- Bean probe: shows how fast the beans themselves are gaining heat. This is the curve you match batch to batch.
- Exhaust probe (if equipped): shows how much heat and moisture airflow is carrying away. Useful for airflow tuning, not for roast-level decisions.
If your roaster only has one probe, know which one it is before building a profile around it. A profile logged on an environmental probe will not transfer cleanly to a roaster with a bean probe, and vice versa.
Why Sight Alone Fails
Ambient light changes how roast color reads: a batch dropped at the same bean temperature looks darker under warm shop lighting than cool daylight, and a phone camera white-balances the difference away. Surface oil is a late-stage signal, by the time you see sheen, you're past the roast level most drinkers want. Sight confirms; it doesn't trigger.
Why Temperature Alone Fails
A single probe reads one point in the drum. In an overloaded or poorly agitated drum, that point can sit several degrees off the average bean temperature, so a perfect-looking curve can still produce mixed roast color. Temperature also can't reveal chaff buildup, scorched bean tips, or a probe that has drifted out of calibration.
A Practical Division of Labor
Use temperature to drive the roast and sight to confirm it:
- Drive on bean temperature and rate of rise. Decide your drop point in degrees and time, not in color.
- Confirm on sight at two checkpoints. Look at the trier or sample spoon at the end of drying and again just before first crack. You are checking for even color across the sample, not matching a shade.
- Calibrate your eyes against a reference. Roast color charts and ground-coffee color comparators give you a fixed reference so your 'medium' means the same thing next month. They are a reference, not a control.
- Re-check probe calibration periodically. An ice-water bath at 32°F and boiling water at roughly 212°F (adjusted for your elevation) will tell you if a thermocouple has drifted (nist.gov).
The Manual-Roaster Repeatability Workflow
This is the part most guides skip: replicating a 'master' profile on a roaster with no automation. The workflow is the same on a stovetop popcorn popper or a manual drum:
- Pick one reference batch and mark it. Note charge temperature, batch weight in grams, burner setting at charge, and the time and bean temperature at first crack.
- Write down every burner and airflow change as a timestamped event. 'Cut burner at 6:30, bean temp 340°F' is a repeatable instruction. 'Turned it down a bit' is not.
- Replay the events, not the feelings. On the next batch, hit the same charge temperature, then execute the same burner changes at the same bean temperatures rather than the same clock times. Bean temperature is the more stable trigger because ambient conditions shift the clock.
- Accept a tolerance band. Manual roasters rarely repeat within a degree. A band of plus or minus 5°F at first crack and plus or minus 15 seconds of development time is a realistic target for a home setup.
- Change one variable per session. If you adjust charge temperature and airflow together, you cannot attribute the result.
A simple spreadsheet with columns for batch number, charge temp, batch weight, first crack time and bean temp, drop time and bean temp, and ambient conditions will outperform most paid apps. The discipline is the tool.
Using Coffee Roast Profile Software for Repeatability
Coffee roast profile software logs bean temperature, environmental temperature, rate of rise, and airflow over time so you can replay a roast instead of guessing.
The real value is repeatability: once you have a curve you like, you match the next batch to it rather than chasing flavor from scratch. Logging also exposes drift, like a probe reading low or a burner losing output.
- Log charge temperature, batch size, and airflow settings
- Record first crack time and development time
- Note ambient temperature and humidity
- Compare curves batch to batch, not just end temperature
How to Identify Roast Defects
Identifying roast defects means matching what you taste and see against what the curve did. Defects are feedback, not failure.
Common defects and their likely causes:
| Defect | What You See or Taste | Likely Cause |
|---|---|---|
| Baked | Flat, papery, low acidity | Stalled rate of rise mid-roast |
| Scorched | Dark patches, burnt notes | Charge temperature too high |
| Underdeveloped | Grassy, sour, pale center | Development time too short |
| Uneven | Mixed roast color in one batch | Poor agitation or overloaded drum |
| Tipped | Charred bean tips | Excessive heat early in roast |
Track defects against your roast curve and you'll start spotting the fix before the next batch.
Managing Environmental Factors and Post-Roast Resting
Two angles most guides skip: the room you roast in and the rest after the drop. Both change how a roast level reads in the cup, and both are free to control.
How Ambient Conditions Move Your Roast
Roasting is heat transfer, which depends on the temperature and moisture of the air around the drum. A roast that works in a cool, dry room can stall in a warm, humid one, same roaster, same settings, different result.
- Cold ambient air pulls heat off the drum faster, so the same burner setting produces a slower rate of rise and a longer drying phase. You may need a higher charge temperature or a longer preheat to compensate.
- Hot ambient air does the opposite. The drum overshoots, the drying phase shortens, and you risk scorching if you do not back off the burner early.
- High humidity slows moisture evaporation from the bean surface, which stretches the drying phase and can push first crack later than expected. It also changes how chaff behaves in the drum.
- Low humidity accelerates drying and can make the roast feel 'fast' even when the bean temperature curve looks normal.
Log ambient temperature and relative humidity alongside every batch, a cheap wall thermometer and hygrometer are enough. Within weeks your best batches will cluster in a narrow ambient band. Once you know your band, adjust charge temperature before you drop beans instead of chasing the curve mid-roast.
Weight Loss as a Consistency Check
Weigh green beans before the roast and roasted beans after cooling. The percentage lost is mostly water and tracks roast level closely: light roasts usually land in the low-to-mid teens, darker roasts higher, depending on bean, roaster, and profile (peer-reviewed research). The value isn't the absolute number, it's that your number repeats batch to batch for the same bean and target roast level. A batch losing noticeably more or less weight than its siblings means something drifted.
Post-Roast Resting: A Protocol, Not a Guess
Freshly roasted beans degas carbon dioxide for days (PubMed). Brew too soon and CO2 interferes with water contact, producing uneven extraction and flat flavor; rest too long and bright aromatics fade. The right window depends on roast level:
- Light roasts: often best after a longer rest, because the denser bean structure releases gas more slowly. Many home roasters find the sweet spot several days after the roast, with the cup still improving past day three.
- Medium roasts: typically peak in a middle window, a few days of rest is usually enough for the CO2 to settle and the sweetness to come forward.
- Dark roasts: degas fastest because the bean structure is more porous. They can taste good sooner after roasting but also fade sooner, so the usable window is narrower.
These windows are starting points, not rules, bean, profile, and brewing method all shift them. What matters is resting every batch the same way before judging it. Taste batch A on day one and batch B on day five and you're comparing rest states, not roast levels.
Storage Between Roast and Cup
Storage during the rest changes how fast beans degas and how long they hold up:
- One-way valve bags let CO2 escape without letting oxygen in. This is the standard for a reason.
- Airtight jars with no valve trap CO2 and can pressurize, which slows degassing and can make the beans taste flat when you finally open them.
- Grinding before storage accelerates staling dramatically. Grind immediately before brewing.
- Heat and light degrade roasted coffee quickly. Store cool, dark, and dry.
Conclusion
A repeatable roast means controlling charge temperature, rate of rise, airflow, and batch size, then logging it all so the next batch has a target. It's process discipline, not expensive equipment.
At Eager Beaver Roasters, every order is roasted to order from carefully sourced beans, with no filler or shortcuts, in light, medium, and dark profiles so you get maximum flavor and aroma. If you'd rather drink consistent coffee than chase it, start with our Cowboy Blend or explore the full lineup.

Frequently Asked Questions
What are the primary indicators of a consistent coffee roast?
Uniform bean color, predictable first crack timing, and a steady rate of rise throughout the roast are the main signals. A consistent coffee roast also shows even weight loss, typically 12-20% depending on roast level, and a roast curve that matches your target profile. If some beans are dark and others light in the same batch, your heat application or agitation needs adjustment.
How does bean density affect roast consistency?
Denser green coffee beans absorb heat more slowly and require higher charge temperatures and longer development time. If you mix beans of different densities in one batch, they will hit first crack at different times, causing uneven roast color. Sort by density or roast single-origin lots separately to keep your consistent coffee roast levels repeatable.
How can I track my roast profiles to ensure repeatability?
Use coffee roast profile software that logs bean temperature, environmental temperature, and rate of rise in real time. Record charge temperature, batch size, airflow settings, and first crack time for every roast. Comparing these logs side by side shows exactly where a batch drifted from your target, so you can adjust burner power or drum speed before the next roast.
Why do my coffee beans have uneven color after roasting?
Uneven color usually comes from insufficient agitation, too large a batch size for your drum, or inconsistent airflow control. Beans resting against the drum wall scorch while others stay underdeveloped. Reduce batch size to 60-70% of drum capacity, increase drum speed, and verify that airflow is pulling heat evenly through the bean mass. Preheating thoroughly also helps.
Consistent roasting is a grind, and most people don't want to spend their weekends logging curves. Eager Beaver Roasters roasts to order so every bag arrives fresh, with light, medium, and dark options and no fillers to muddy the cup. Find your perfect roast and let us handle the repeatability.