

Stages of Coffee Roasting Explained: From Green to Perfect
Table of Contents
- The Four Stages of Coffee Roasting: An Overview
- Stage 1: The Drying Phase
- Stage 2: The Maillard Reaction and Browning
- Stage 3: First Crack and the Development Phase
- Stage 4: Second Crack and the Roast Curve
- Coffee Roast Levels Explained: Light, Medium, and Dark
- How Long Does It Take to Roast Coffee Beans?
- Choosing the Best Dark Roast Coffee for Espresso
- Frequently Asked Questions
Last Updated: September 7, 2026
The Four Stages of Coffee Roasting: An Overview
Coffee roasting is the application of heat to transform dense, grassy green coffee beans into aromatic, soluble beans ready for brewing. The entire process unfolds in four distinct stages: drying, the Maillard reaction, first crack with development, and second crack.
At Eager Beaver Roasters, we roast every batch to order because the stages of coffee roasting directly determine flavor, aroma, and freshness.
Green coffee beans contain roughly 8-12% moisture, and the roaster must drive that moisture out before any real flavor development begins (sca.coffee).
Stage 1: The Drying Phase
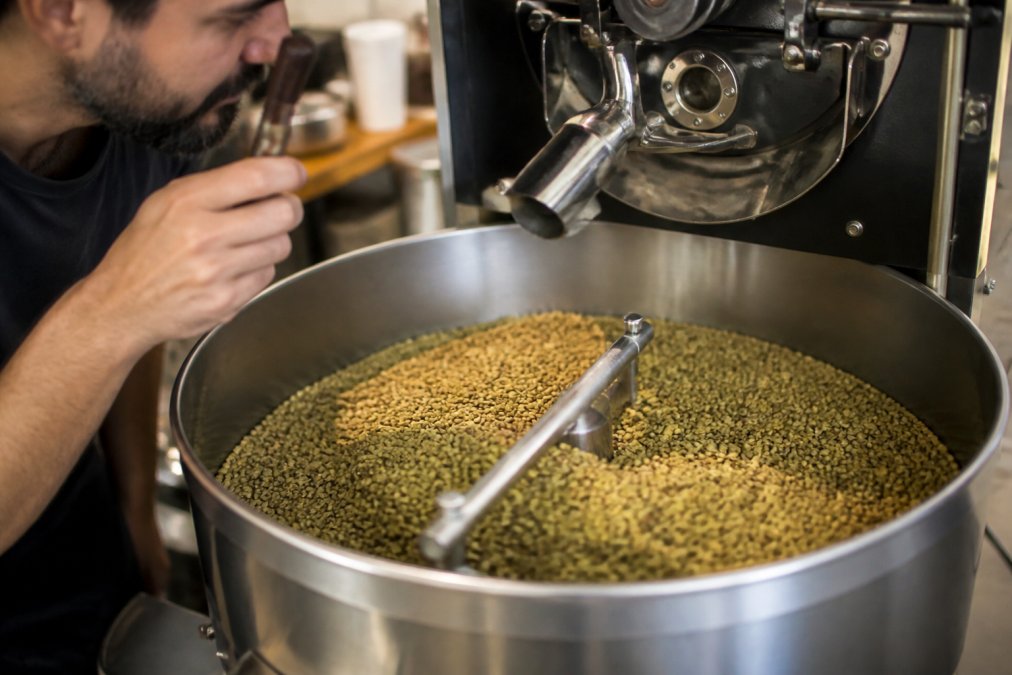
The drying phase is the first stage of coffee roasting, setting the foundation for everything that follows. The bean absorbs thermal energy and releases moisture, turning from green to a pale yellow or cinnamon color.
This stage is endothermic, meaning the bean is taking in heat rather than releasing it. The internal bean temperature climbs steadily from ambient to roughly 300°F (150°C), and the bean swells as water turns to steam. According to the Specialty Coffee Association's roasting fundamentals, proper drying prevents uneven roasting and baked flavors later in the process.
The drying phase typically lasts 4-8 minutes. Rushing it is a common mistake: pushing heat too hard dries the surface faster than the core, creating underdeveloped, grassy flavors in the final cup.
Stage 2: The Maillard Reaction and Browning
Once the bean has dried sufficiently, the Maillard reaction begins, the same chemical process that browns bread crust and sears meat, where the coffee's flavor complexity truly starts to build.
The Maillard reaction is still endothermic, with the bean temperature ranging from roughly 300°F to 350°F (150°C to 177°C). During this phase, amino acids and sugars react to form hundreds of aromatic compounds. The bean darkens from yellow to tan and then to light brown, and the grassy, hay-like aroma of green coffee gives way to a toasty, bready scent.
This stage typically lasts 3-6 minutes. A slower Maillard phase tends to produce a sweeter, more caramelized cup, while a faster phase preserves more acidity and origin character.
Stage 3: First Crack and the Development Phase
First crack is the audible signal that the coffee roasting process has entered its most critical phase. Around 385°F to 400°F (196°C to 204°C), internal pressure from steam and carbon dioxide builds until the bean structure physically pops (peer-reviewed research).
First crack marks the transition from an endothermic to an exothermic reaction. The bean begins generating its own heat as the chemical reactions shift, and the roaster must carefully manage the energy input to avoid stalling or scorching. This is the start of the development phase, the window where the roast profile is finalized.
The development phase typically lasts 1-3 minutes. The development time ratio, the percentage of total roast time spent after first crack, is a standard metric for consistency. Most specialty roasters target a ratio between 15% and 25% of the total roast.
Stage 4: Second Crack and the Roast Curve
Second crack is the point of no return for dark roasts. Around 435°F to 450°F (224°C to 232°C), the coffee's internal structure breaks down further, and the bean pops a second time, more softly and rapidly.
The chemistry shifts from the Maillard reaction to pyrolysis, the thermal decomposition of the bean's material. Caramelization deepens into a smoky, bittersweet character, and the bean's cellular structure becomes increasingly fragile and oily as moisture and volatile compounds are driven off.
The roast curve at this stage is steep, and small timing differences produce dramatically different results. A roast pulled just after second crack begins will have a dark, rich flavor with low acidity; leaving it longer risks becoming ashy. After the roast, beans are dropped into a cooling tray and quenched with air to stop the process instantly.
Coffee Roast Levels Explained: Light, Medium, and Dark
Coffee roast levels come down to how far the bean travels through the stages above. Light roasts are dropped during or shortly after first crack, preserving origin characteristics, acidity, and floral or fruity notes.
Medium roasts are developed further past first crack, producing a balanced cup with more body and sweetness. Dark roasts are dropped during or after second crack, yielding a bold, smoky, low-acid cup with a shiny, oily surface.
The Agtron scale, a scientific measure of roast color, is the industry standard for classifying roast levels. The choice of roast level is a matter of personal preference. For a smooth, rich cup with chocolate and caramel notes, a dark roast like our Italian Roast delivers a heavy body and a clean finish that stands up well to milk or sweetener.

| Roast Level | Dropped After | Bean Color | Flavor Profile | Best For |
|---|---|---|---|---|
| Light | First crack | Light brown, dry | Floral, fruity, high acidity | Pour-over, single origin |
| Medium | Post first crack | Medium brown | Balanced, sweet, moderate acidity | Drip coffee, cold brew |
| Dark | Second crack | Dark brown, oily | Smoky, bold, low acidity | Espresso, French press |
How Long Does It Take to Roast Coffee Beans?
A typical batch runs 10-16 minutes from charge to drop, but total time is a lagging indicator. What separates a skilled roaster from a beginner is how heat is applied and controlled within each stage.
Rate of Rise (RoR) and Heat Application
The single most important metric on your roast curve is the Rate of Rise (RoR), measured in degrees Fahrenheit per minute, telling you how much thermal energy the bean mass is absorbing. A well-executed roast shows a steadily declining RoR from the end of drying through first crack.
- Drum Roasters: These rely primarily on conduction. The metal drum transfers heat directly to the bean surface. To manage RoR, you adjust the gas flame and drum speed. A common mistake is leaving the gas too high during the Maillard phase, which causes the bean surface to scorch before the core has developed.
- Fluid Bed (Air) Roasters: These use a high-velocity stream of hot air to suspend and heat the beans. This method is highly convective and transfers heat much faster than a drum, so the drying phase is often shorter (4-6 minutes). The key controls are airflow and air temperature. A common issue is 'tipping,' where the bean's tip scorches because the air temperature is too high.
The Danger of a 'Baked' Roast
A 'baked' coffee results from a stalled roast curve, when you cut heat too aggressively during the Maillard or development phase, causing the bean temperature to plateau or drop. The bean steams in its own moisture, producing a flat, bread-like cup. The telltale sign is a RoR that hits zero or goes negative before first crack.
The Role of Charge Temperature
The charge temperature, the temperature of the drum or air stream when you load the beans, sets the stage for the entire roast. A higher charge (e.g., 400°F in a drum) shortens the drying phase; a lower charge (e.g., 350°F) extends it, preserving more acidity but risking a 'baked' flavor. A charge that brings the bean to the end of drying (around 300°F) in 4-5 minutes is a good starting point for a balanced profile.
Batch Size and Its Effect on Time
Batch size directly impacts heat transfer. A larger batch has more thermal mass, taking longer to heat and resisting rapid temperature changes. Overloading can lead to uneven roasts, with beans on the outside scorched and the center underdeveloped. Consult your roaster's manufacturer guidelines for optimal batch size.
Choosing the Best Dark Roast Coffee for Espresso
Selecting a dark roast for espresso is less about origin and more about how the roast profile has manipulated its chemical structure. The goal is enough soluble solids for a thick, syrupy body, but not so much that the extraction tastes ashy or bitter.
Sensory Profile Mapping for Dark Roasts
A more useful approach is to map specific sensory outcomes to the stage at which the roast was dropped, allowing you to troubleshoot a disappointing bag based on what you taste.
- Dropped at the very start of second crack (around 435°F): Expect a pronounced bittersweet chocolate note, low acidity, and a medium-heavy body. The bean's cellular structure is just beginning to fracture, so there will be some oil on the surface but not a slick sheen. This is often the sweet spot for espresso.
- Dropped 30-60 seconds into second crack (around 445°F): The pyrolysis reaction has progressed further. You will taste more of the roast itself, smoke, dark cocoa, and a heavier, almost syrupy body. Acidity is nearly undetectable. The risk is a 'hollow' or one-dimensional shot.
- Dropped well into second crack (above 450°F): The bean is now essentially charcoal, with flavors dominated by ash and a harsh, burnt bitterness. The cellular structure has collapsed, and the bean will be very oily. While some traditional Italian roasts go this dark, it is generally considered a defect in specialty coffee.
Troubleshooting Common Dark Roast Defects
If your espresso tastes 'baked' or flat, the problem likely occurred during the Maillard phase, a roast developed too slowly before first crack will lack the sugars to balance intense extraction. If it tastes sharply bitter and dry, the roast was likely dropped too late into second crack.
- Tipped Beans: Look for beans with a dark, burnt spot on one end. This indicates heat was applied too aggressively during the drying or Maillard phase, scorching the tip before the center was fully developed, translating to a sharp, acrid note in the espresso.
- Underdeveloped Core: If the beans look uniformly dark on the outside but the espresso tastes grassy or sour, the roast may have been rushed. The surface reached second crack temperatures while the core was still underdeveloped.
The Role of Bean Density and Blend Composition
For espresso, bean density matters more than for other brew methods. A high-density bean (grown at high altitude) can withstand a longer development phase without becoming ashy; a lower-density bean reaches second crack faster and can easily become over-roasted. Many roasters build espresso blends combining high-density Arabica for sweetness with 10-20% Robusta for crema and body. When choosing a dark roast for espresso, look for one that specifies bean origin and density.
Frequently Asked Questions
What are the three main phases of the coffee roasting process?
The three main phases are the drying phase, the Maillard reaction (browning) phase, and the development phase. Roasters often break the development phase into two parts, separated by 'first crack.' The entire process, from green coffee to a finished roast, typically takes 10 to 15 minutes, depending on the machine and the desired roast level.
At what temperature does the Maillard reaction occur during roasting?
The Maillard reaction begins around 300°F (150°C) after the beans have dried. This is when the beans start to brown and develop complex flavor compounds. It's a critical stage for building the coffee's body and aroma, distinct from the caramelization of sugars that happens at higher temperatures.
How does roasting time affect the flavor profile of coffee?
Roasting time directly shapes the flavor. A shorter roast, ending right after first crack, preserves more of the bean's origin character, producing higher acidity and brighter, floral notes. A longer roast with more development time creates a darker, oilier bean with heavier body, lower acidity, and deeper, bittersweet chocolate or caramelized sugar flavors.
Why is the cooling phase critical in coffee roasting?
The cooling phase locks in the flavors developed during the roast. If the beans are not cooled quickly, the residual internal heat continues the roasting process, which can lead to a burnt or 'baked' taste. Rapid cooling on a tray halts the chemical reactions at the exact roast level the roaster wants to achieve.
Fresh coffee roasting is a balance of chemistry, timing, and sensory judgment. The stages of coffee roasting, from the drying phase through second crack, determine whether your cup tastes bright and floral or dark and smoky. At Eager Beaver Roasters, we roast every order fresh in light, medium, and dark profiles so you can taste the difference that proper roasting makes. Find your perfect roast and taste what carefully sourced, filler-free beans roasted to order actually deliver.