

How to Taste Coffee Like a Pro: A Step-by-Step Cupping Guide
Quick Summary
To taste coffee like a professional, brew two or more coffees side by side using the same grind, water and brew time, then smell, slurp and compare them. This controlled method, called cupping, makes the differences you notice come from the coffee itself.
- Use about 8.25 grams of coffee for every 150 milliliters of water.
- Grind every sample to the same medium-coarse setting.
- Brew with water around 200°F (93°C) and steep for about four minutes.
- Break the crust three times, then slurp to spread the coffee across your palate.
- Score each coffee on a 1-10 scale with anchored definitions for consistent results.
Table of Contents
- What Coffee Cupping Is and What You Need at Home
- Coffee Cupping Steps: Preparing Your Samples
- Smelling the Grounds and Breaking the Crust
- Slurping, Tasting and Telling Acidity From Bitterness
- How to Describe Coffee Taste With the Flavor Wheel
- How to Describe Coffee Taste on Your Scorecard and Fix Confusing Results
- Your Next Step: Taste the Single Origin Favorites Sample Pack
- Frequently Asked Questions
What Coffee Cupping Is and What You Need at Home
Last Updated: October 31, 2026
Cupping is the standard way professionals taste coffee side by side, and you can do it at your kitchen counter with a few basic tools. The method is simple: brew small, equal batches of different coffees, then smell, slurp, and compare them.
Cupping is a controlled way to taste coffee. Each sample gets the same grind, the same water, and the same brew time. That way, the differences you notice come from the coffee itself, not from how you made it.
What you need at home:
- A small bowl or cup for each sample, all the same size
- A tablespoon or cupping spoon for breaking the crust
- A kitchen scale that reads in grams
- A burr grinder set to a medium-coarse grind
- Hot water, around 200°F (93°C)
- A timer and a notepad or scorecard
- Two or more coffees to compare, such as the Colombia and Ethiopia Natural
Start with two coffees. Comparing side by side is what teaches you the most, and two samples keep the process manageable.
Coffee Cupping Steps: Preparing Your Samples
A common home cupping ratio is about 8.25 grams of coffee for every 150 milliliters of water.
Weigh your beans just before grinding, because aroma fades fast once beans are ground. Grind each sample to the same medium-coarse setting so the extraction stays even. Pour the water over the grounds right after grinding and start your timer.
Coffee-to-Water Ratio, Grind Size and Water Temperature
Consistency matters here. Keep these three variables steady across every sample:
- Ratio: About 8.25 grams of coffee per 150 milliliters of water
- Grind size: Medium-coarse, similar to coarse sand
- Water temperature: Just off the boil, around 200°F (93°C)
A common mistake is grinding one sample finer than the others. For a professional quality standard to check your scores against, see roast quality control cupping guide. Finer grounds pull out more bitterness, which can make a bright coffee taste harsh and throw off your comparison.
Let the coffee steep for about four minutes. Then you are ready to smell and taste.
Smelling the Grounds and Breaking the Crust
Smelling is your first chance to judge a coffee. Before any water goes in, put your nose over the dry grounds and take a slow sniff. Note what you smell, such as nuts, fruit, or chocolate.
Once the coffee has steeped, a crust of grounds forms on top. Cuppers call this step breaking the crust. Gently push the crust aside with your spoon, three times in a row, and breathe in the wet aroma that rises up. Wet aroma often shows different notes than dry grounds do, so compare both.
Watch out: Breaking the crust too hard can splash hot coffee on your hand. Push the grounds gently and keep your face back from the bowl.
Slurping, Tasting and Telling Acidity From Bitterness
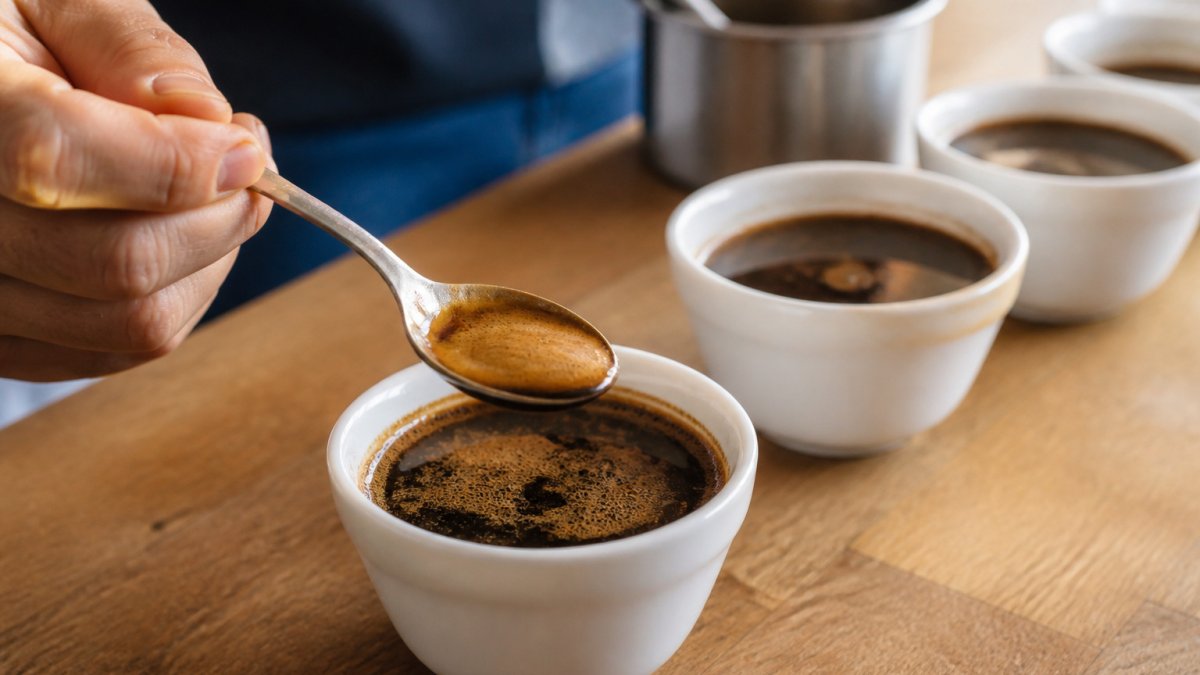
Slurping is how professionals spread coffee across the palate. Take a spoonful, then slurp it loudly and quickly so the coffee coats your whole mouth. The noise feels odd at first, but it works: mixing air into the liquid carries aroma to the back of your nose, where most of what you call "flavor" is actually perceived. Aim for a fine mist, not a gulp.
Now sort what you taste. Most beginners mix up acidity, sourness, bitterness, and astringency, so use these side-by-side cues instead of a trait list:
- Acidity is a bright, sparkling sensation that shows up quickly on the sides of the tongue and fades fast. Think citrus zest or green apple. In light and medium roasts it is a positive trait and usually tracks with higher-grown coffees.
- Sourness is sharp and unpleasant, like vinegar or unripe fruit, and it sits forward on the tongue. It usually means under-extraction: too coarse a grind, too short a steep, or water that is not hot enough.
- Bitterness is a dry, sharp taste at the back of the tongue that lingers after you swallow. It usually comes from over-roasting or over-extraction, too fine a grind or water that is too hot.
- Astringency is not a taste at all but a tactile drying, like strong black tea or an unripe banana, that makes your cheeks and gums feel tight. It often signals over-extraction or a coffee that was roasted too dark.
- Sweetness shows up as caramel, honey, or brown sugar and tends to land mid-palate, after the initial brightness.
Rate each sample for body, which is how heavy or thick it feels, compare whole milk to skim milk as your mental scale, and for aftertaste, which is what remains 30 seconds after you swallow. Write down these traits while they are fresh, and note where on the tongue each sensation landed. Location plus timing is what separates a confident call from a guess.
A common pattern is that a coffee tastes "sour" to a new taster when it is actually bright and under-sweet. To see how aging shifts acidity, read why coffee tastes sour after two weeks. Before you blame the brew, check the scorecard: if acidity scored high and sweetness low, the coffee is probably just a bright profile, not a defect.
Single Origin Favorites Sample Pack →
How to Describe Coffee Taste With the Flavor Wheel
Many new tasters struggle to put a coffee into words. The coffee flavor wheel solves that problem. It is a chart that groups flavors into families, such as fruity, nutty, floral, and sweet, with more specific notes inside each family.
Start at the center of the wheel and work outward. If a coffee tastes like peach and honey, you would first pick "fruity" and then "stone fruit" and "honey" from the next ring.
The Ethiopia Natural is a good sample to practice on. For a full breakdown of its notes, see Ethiopian light roast flavor notes. Its listed tasting profile is milk chocolate, fruity, and caramel, which you can match on the wheel. Compare that to the Colombia, whose listed profile is dried orange, berry, and chocolate.
Use specific words. "Tastes good" tells you nothing, but "bright citrus with a caramel finish" gives you a clear picture of the coffee.
How to Describe Coffee Taste on Your Scorecard and Fix Confusing Results
A scorecard turns your impressions into data you can compare over time. Use a simple 1-10 scale, but anchor each number so your scores mean the same thing every session:
- 1-3: hard to drink, a clear defect
- 4-5: drinkable but flat or muddled
- 6-7: clean and pleasant, easy to describe
- 8-9: vivid, layered, and memorable
- 10: the best cup you have had this year
Score overall quality first, then rate acidity, sweetness, body, and aftertaste separately, and add one line of tasting notes. Keep the same sheet for every sample so you can compare across days.
| Coffee | Aroma (dry) | Aroma (wet) | Acidity /10 | Sweetness /10 | Body /10 | Aftertaste /10 | Overall /10 | Notes |
|---|---|---|---|---|---|---|---|---|
| Sample A | ||||||||
| Sample B |
Score blind where you can, have someone else label the cups A and B, so expectation does not steer your numbers.
A calibration exercise that builds skill fast
Taste the same coffee three ways on the same day: as brewed, diluted with an equal splash of hot water, and with a pinch of sugar stirred in. Score each. The diluted cup shows you which notes are acidity versus intensity, and the sweetened cup shows you how much sweetness was already there. Repeat with a second coffee and compare the two sets of scores. If your ranking of the two coffees holds across all three versions, your palate is calibrating.
Troubleshooting inconsistent or confusing results
If your results seem confusing, check these common causes in order:
- Every coffee tastes the same: your grind or water temperature drifted between samples, or you tasted them more than a few minutes apart. Re-weigh and re-time each one.
- Everything tastes bitter: the grind is too fine or the water is too hot. Coarsen one notch and retry. For grind adjustments on darker roasts, see adjusting espresso grind size for dark roasts.
- Everything tastes sour: the grind is too coarse, the steep was too short, or the water was not hot enough.
- You cannot identify any notes: palate fatigue is the usual culprit. Limit yourself to three or four samples per session, rinse your spoon in hot water between tastes, and take a plain-water break every two samples.
- Scores swing wildly day to day: you are likely tasting at different times or after different meals. Taste before strong food or coffee, and keep sessions at the same time of day.
You can also check your palate by tasting the same coffee twice on different days. If your scores land within one point, your tasting is consistent; if they swing by three or more, revisit your setup before you trust the notes.
For a deeper look at how coffee changes over time, our guide on why coffee tastes sour after two weeks explains how freshness affects acidity.
Your Next Step: Taste the Single Origin Favorites Sample Pack
The best way to practice cupping is to taste several coffees side by side. You can buy the single origin sample pack and taste them for yourself. The Single Origin Favorites Sample Pack includes six 2 oz packs of single origin coffees, so you can compare regions on the same day. It costs $24.99.

Each origin gives you a different flavor profile to practice on. The Brazil Santos offers an elegant cup with cocoa notes, while the Honduras brings caramel, spice, and brown sugar. Use the scorecard and flavor wheel from this guide to describe each one.
Start cupping today, and keep notes on every sample.
Frequently Asked Questions
How do professionals taste coffee?
Professional tasters use a standardized cupping protocol: they grind a set dose of coffee, pour hot water over it at a fixed ratio, wait several minutes for the grounds to settle, then smell, break the crust, and slurp the coffee from a spoon. Each sample is evaluated for fragrance, aroma, flavor, acidity, body, sweetness and aftertaste, and scored on a consistent scale. The consistency of the method is what lets tasters compare samples fairly, so following the same steps and timing each time matters more than any single sensory trick.
Do you need special equipment to taste coffee like a professional?
You do not need expensive gear to start. A kitchen scale, a grinder, a few clear cups or small bowls, a tablespoon for breaking the crust, and a regular spoon for slurping are enough for a basic coffee cupping at home. A timer helps you keep each sample consistent. Specialized cupping bowls and spoons make the process more repeatable, but they are optional for beginners who want to build the habit first.
How do you identify flavor notes in coffee?
Start by tasting one sample at a time and noting the first impression, then the change as the coffee cools. Compare the coffee against familiar foods such as citrus, dark chocolate, berries or caramel to name what you notice. Using a coffee flavor wheel gives you specific words to choose from, which makes it easier to describe what you taste. Tasting several coffees side by side, such as a light and a dark roast, sharpens your ability to pick out differences.
What do acidity and body mean when tasting coffee?
Acidity is the bright, tangy sensation that makes a coffee taste lively, often compared to citrus or green apple. It is a positive quality when balanced, but sourness signals under-extraction. Body describes the weight or texture of the coffee on your palate, from light and tea-like to heavy and creamy. Mouthfeel and body are judged by how the coffee feels in your mouth, not only by how it tastes.
